New Zero Delay USB Encoder to PC Joystick and Button For MAME & Fight Stick Controls DIY Arcade Game Machina Kit Parts
You will be redirected to AliExpress to complete your purchase
Specifications
- Brand Name
- NONE
- High-concerned chemical
- None
- Type
- Coin Pusher
- Age
- >6 Years, <3 Years
- Origin
- Mainland China
- Model Number
- 11111
- is_customized
- Yes
- Choice
- yes
- semi_Choice
- yes
Product Description
Description:
This is a perfect encoder for your USB MAME Cabinet DIY Projects.
Sanwa JLF Series Joysticks & Sanwa OBSF-30 Buttons can perfect fit for this encoder kit!
Theoretically to say it can support all the Windows System.But haven't test all of them.Can make sure it can support Windows XP,Windows 7,Windows Vista & Windows 8.It also can perfect fit for Raspberry Pi Retropie Projects & Raspberry Pi 2 Retropie Projects.
Each Encoder have its own USB Cable to make sure that Multiplayer can play the games in the same condition!
Tips:
1:The item need work with MAME emulator.So before your build your own project.Please download one to work with the parts!
2:If you use this kit to build your own Raspberry Pi Retropie Projects.Please search the steps before your DIY.
The Zero delay USB Pc Encoder is the most cost effective encoder option.
Use this encoder set you can easily DIY your own arcade game machine.
You just need simply connect your arcade controls into the encoder board with the included wires, And then plug the encoder into your computer,then just enjoy your arcade Games with your PC.
It is also a very compact encoder. The size for the encoder board just 8.5 cm X 3.5 cm X 1 cm.
Note:
Due to the hand measurement, there have size error about 1-5mm
Item color displayed in photos may be showing slightly different on your computer monitor since monitors are not calibrated same
Specifications:
RAM: 5P8P
Interface type: USB interface
Operating System: Wiring
Applications: Game consoles
Package A:
1xZero delay encoder board
Package 1:
1xHigh quality encoder board
1xUSB Cable
16x4.8mm Wire cables for Happ Style Buttons and joystick
Package 2:
1xHigh quality encoder board
1xUSB Cable
1x5pin Wire cables for joystic
10x2.8mm wire cable for button
Package 3:
1xHigh quality encoder board
1x USB Cable
4x4.8mm Wire cables for joystick
8x 2.8mm wire cable for button
Package 4:
2xHigh quality encoder board
2xUSB Cable
32x 4.8mm Wire cables for Happ Style Buttons and joystick
Package 5:
2xHigh quality encoder board*2
2xUSB Cable *2
2x 5pin Wire cables for joystick
20x2.8mm wire cable for button
Package 6:
2xHigh quality encoder board
2xUSB Cable
8x4.8mm Wire cables for joystick
16x2.8mm wire cable for button
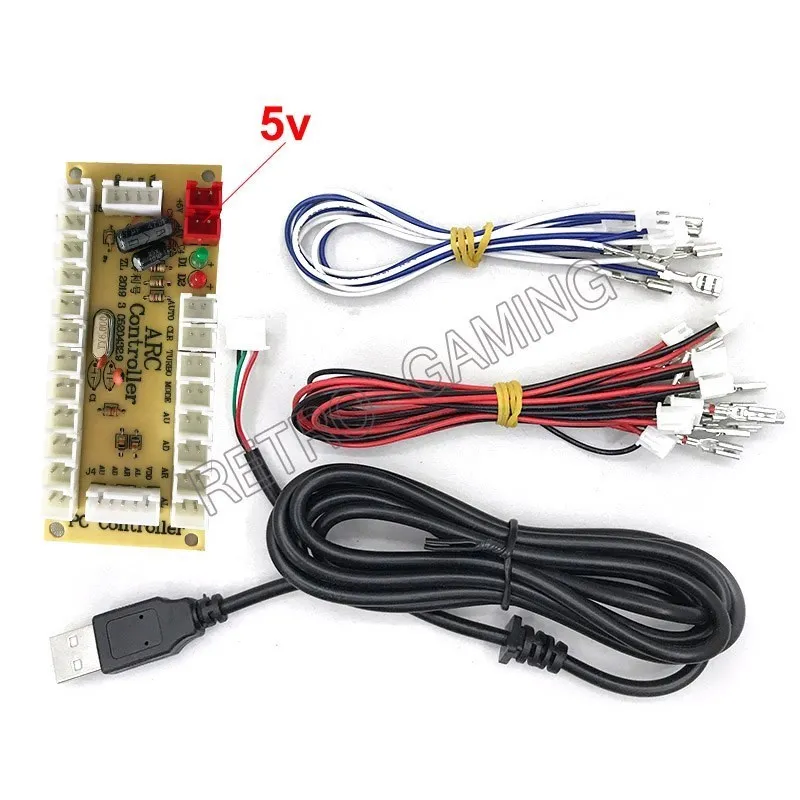
★As the picture shows
1.Connect push buttons to KI- K12 Slots
There is no need to separate buttons function from KI to K12. Maximum support 12 push but: ons Connect buttons to Function Button Slots if you
need to use the additional function buttons. Such as Auto-Fire, Turbo-Fire, Vision-Helmet Clear Function.
How to activate these function buttons?
(1)Vision-Helmet activate by push the "Mode"Button one times
Push it again to cancel.
(2)Other Functions activate by Push the Function Button with One Fight Button at the same time. For Example, If you want to Activate the Auto-Fire
Function. Push"Auto+"KI" Button at the same time. "KI" Button will activate Auto-Fire function till you Push"Clear"+"KI"at the same time to
cancel it
2. Connect Joystick to joystick output slots
sPin Joystick Slot used to connect 5Pin Type Joystick by using 2. 54mm Pitch JST XH Adapter Cable. Fit for most Japanese joysticks
2Pin Joystick Slots used to connect 2Pin Type Joystick by using 48mm/o 11"Terminal 2Pin wires. Fit for most joysticks that can directly see the micro
switch terminals. Attention: 2Pin Type Joystick need separate the directions to the correct slots.
Product information last updated on December 29, 2025